In the dynamic world of e-commerce, it’s often the most desired items that fly off the shelves first, leaving potential buyers eagerly awaiting restocks. These highly sought-after products are frequently added to wishlists, signaling strong customer interest. By sending timely low stock and back-in-stock emails, you not only create a sense of urgency but also reignite customer enthusiasm and drive sales. This approach allows you to transform passive interest into active purchases, enhancing customer satisfaction and boosting your bottom line.
Before proceeding, please ensure that the Omnisend integration is complete. If you have not yet done so, please refer to the Enabling Omnisend Integration document for guidance
Wishlist Plus Starter Plan or above
Omnisend Account
Wishlist Plus-Omnisend integration enabled
Before you get started, you need to make sure you’ve enabled the wishlist back in stock event within Wishlist Plus.
Navigate to the Apps section and select Settings. Within the Events & Triggers Settings, under the Alerts & Triggers on wishlisted items section, ensure that the “Send Back in Stocks Alerts” checkbox is enabled.

Once enabled, Wishlist Plus will send an event to Omnisend each time a product on a customer’s wishlist is Back in stock.
Step 1: Navigate to the Automation page in Omnisend and select + Create workflow in the upper righthand corner.

Step 2: Click Create from scratch and rename the automation as Wishlist Back in Stock.


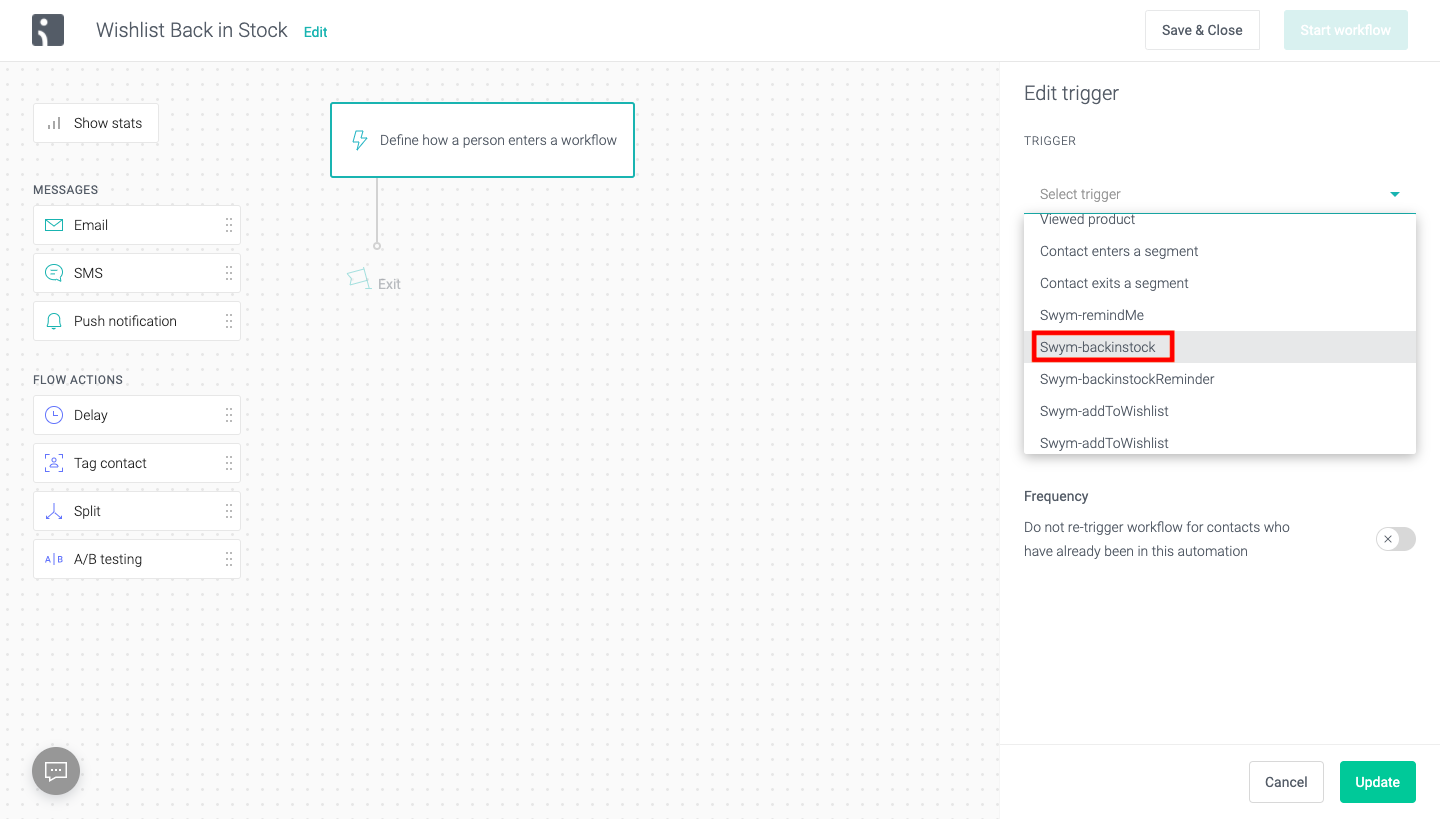
Step 3: Next you’ll need to set the trigger for this workflow. Choose Swym-backinstock from the dropdown on the right.
Note:To see the complete version, you may still need to trigger a back in stock on your store. However, you can also trigger a test email from Swym which will contain a sample product! Please follow the steps below to proceed.

Step 4: You need to Add a Tag for Test Emails.
Step 5: Next, we’re going to add an Audience filter, which we’ll use during development for this workflow. We’ll remove it later once we’re ready to make this workflow live.

Because the timing of this event isn’t driven by an action taken by the shopper, there’s no benefit to adding a time delay before the email is sent.
Step 6: Next add an email to your flow, this will be your back in stock message.

The next thing we’ll do is build an email template that consumes the back in stock data passed from Wishlist Plus to create our triggered email campaign.
Here are the event-level data elements included with the event:
Step 1: Fill out the subject line, preheader and sender’s name.
Note: You will be able to use data elements from the Swym-backinstock event to personalize the subject and preheader text.
Step 2: Then click the Edit content button to edit the email.

Step 3: Omnisend has multiple standard templates for you to choose from. Choose your template and click Use Template.

Step 4: Once the template is open, you can add your logo to the top if you like or remove the image block. You can also remove existing blocks or choose to add from other available blocks. We’ll next add a HTML block from the library under Quick Add. We’ll use html to pull in data from the Swym-backinstock event.


Here is the html we used for our simple email template:
<p style="text-align: center">
	The [[event.ProductName]] you were interested in is now back in stock!
</p>
<p style="text-align: center">
	<img height="250" src="[[event.ImageURL]]" width="400"/>
</p>
<p style="text-align: center">
	<a href="[[event.ProductURL]]">[[event.ProductName]]</a>
</p>Once you have saved your template, you can preview it to ensure it looks as expected. While Omnisend now offers a test trigger option to quickly check the email’s appearance, it won’t display all details of the final automation. To see the complete version, you may still need to trigger the action from your store. Follow the steps below to proceed.
Step 1: Go to Wishlist Plus→ Integrations→ Omnisend. Click Manage.
Step 2: In the Test Events and Trigger section, select Send Back in stock alert, enter your email address and click Send Test Triggers.

Note: Make sure that you have an Audience filter added to the email ID you are sending the test email to (as mentioned in Point 2 Step 4). This will ensure that you can test the automation from your end (using the Audience Filter option) before sending it out to your customers.
When you’re satisfied with your testing, the last step is to remove the Audience filter by simply clicking on the cross. With this, your Omnisend integration is live and your emails should start flowing to your customers!

Helping e-commerce brands craft a more seamless experience for their customers